No items found.
How to Edit a Video: A Step-by-Step Guide for Beginners (2026)
June 3, 2026

Editing a video comes down to eight repeatable steps: import, cut, sequence, add B-roll, caption, fix audio, color, and export. Here's how to do each one — the manual way and the faster AI way.
Editing your first video feels intimidating because the software looks like an airplane cockpit. It isn't. Every edit — from a phone clip to a Hollywood trailer — follows the same handful of steps. Learn the sequence once and you can edit anything.
This guide walks through the complete process step by step, in plain language. We'll cover the traditional manual workflow first, then show you how AI tools collapse most of it into a few clicks. When you're done, browse our 50 data-backed video editing tips to sharpen the result.
What You Need Before You Start
You don't need expensive gear to edit well. You need three things:
- Your footage — the video clips, plus any photos, music, or voiceover you want to include.
- Editing software — free options like CapCut, iMovie (Mac/iOS), or DaVinci Resolve are plenty to start; an AI video editor skips most of the manual work entirely.
- A clear goal — know the platform (YouTube, TikTok, Reels) and rough length before you cut. The target shapes every decision that follows.
Step 1: Import and Organize Your Footage
Open your editor and import (or drag and drop) all your clips, images, and audio into the media library. Before you touch the timeline, organize:
- Create a project folder with subfolders for raw clips, audio, and graphics.
- Label clips so you can find your best takes quickly.
- Back up your originals — the 3-2-1 rule (3 copies, 2 types of media, 1 off-site) saves projects.
A few minutes of organization here saves hours later. The fastest edit is the one where you never hunt for a file.
Step 2: Make a Rough Cut
Drag your clips onto the timeline in the order your story should flow. Don't aim for perfect — aim for a complete first pass:
- Pick your best take for each section.
- Drop clips in sequence to tell the story start to finish.
- Trim the obvious junk: dead space at the start and end of each clip, bloopers, and long pauses.
This rough assembly is your skeleton. You'll refine it next.

Step 3: Tighten the Edit (Pacing and Cuts)
This is where a video goes from watchable to good. Be ruthless:
- Cut every pause, filler word ("um," "uh," "like"), and tangent.
- Aim to make a cut every few seconds — even a subtle reframe resets attention.
- Use jump cuts to remove gaps, and cut on motion to hide the edit.
Manually scrubbing for silences is the most tedious part of editing. AI silence removers do this pass automatically — here are the best AI silence removers to speed it up.
Step 4: Add B-Roll, Transitions, and Effects
Now add visual variety. B-roll — supporting footage over your narration — is one of the most underused techniques (it appears in only about 6% of clips), which makes it an easy way to look more polished:
- Lay cutaway footage over talking-head sections so there's always something to watch.
- Use simple transitions sparingly. A clean cut or a quick crossfade beats flashy wipes that distract.
- Add a slow zoom or pan to static images to keep them alive.
Resist the urge to over-effect. Restraint reads as professional; gimmicks read as amateur.
Step 5: Add Captions and On-Screen Text
If you do nothing else, do this. In our analysis of 13.5 million clips, captions appear in 80.2% of top-performing videos and animated captions in 78.6% — because most social video is watched on mute.
- Auto-generate captions, then proofread for homophones and names.
- Animate them word-by-word and keep lines short (one to two words per beat).
- Place captions in the lower third, above the platform's buttons.
- Add a single text overlay to reinforce your one key point.
Step 6: Fix Your Audio
Audiences forgive rough video but not bad audio. Clean sound is the single fastest upgrade:
- Remove background noise, hum, and clicks.
- Balance levels so dialogue is clear and consistent.
- Add music underneath — ducked well below your voice — to set the pace.
Step 7: Color Correct and Grade
Color correction fixes problems; color grading sets a mood.
- Correct first: fix exposure and white balance so footage looks natural and clips match each other.
- Grade second: apply a consistent look or LUT for style. Keep it subtle — your goal is cohesion, not an Instagram filter.
Step 8: Export for Your Platform
Finally, render your video at the right spec for where it's going:
- Vertical 9:16 for TikTok, Reels, and YouTube Shorts.
- Horizontal 16:9 for standard YouTube.
- Export at 1080p (or 4K if you shot it) and H.264 for the best size-to-quality balance.
Wrong-ratio or letterboxed video reads as reposted spam, so always match the platform's native format.
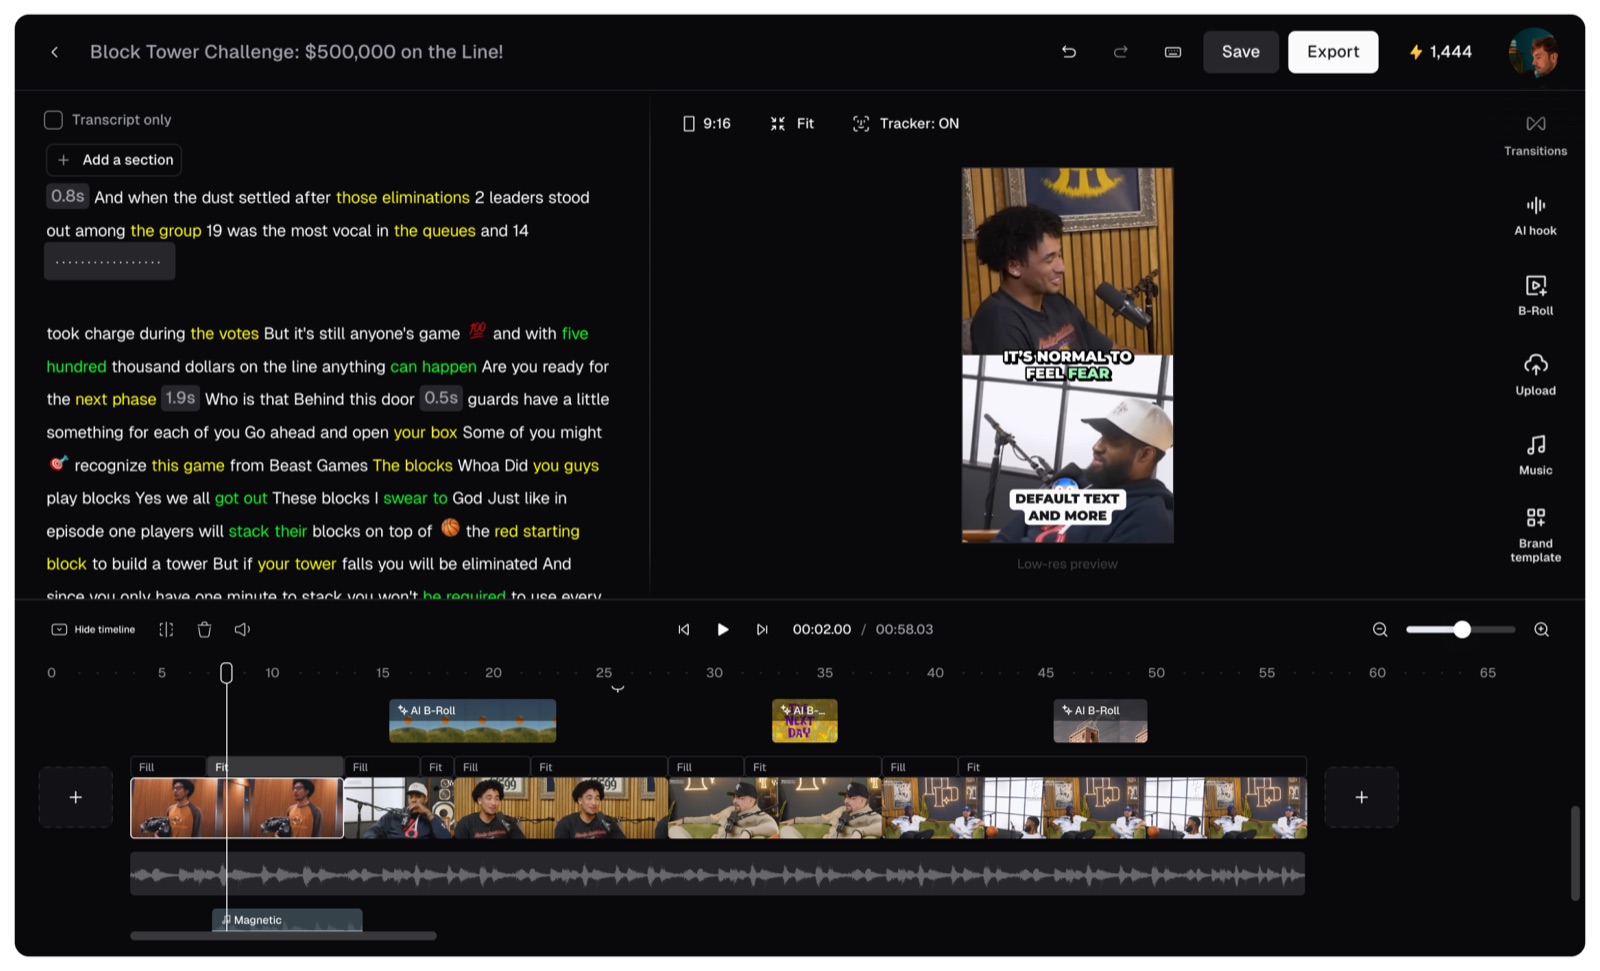
The Faster Way: How to Edit a Video With AI
Those eight steps are the fundamentals — but you no longer have to do most of them by hand. An AI video editor automates the tedious 80%:
- Upload your raw video or paste a link.
- Let the AI analyze it — it finds the best moments, removes silences, and assembles a rough cut.
- Auto-caption and reframe for your target platform in one click.
- Customize the parts that matter — swap music, tweak captions, adjust the hook.
- Export ready-to-post clips.
This is especially powerful for repurposing: one long video becomes a dozen captioned short clips automatically. Here's a deeper look at how to automate video editing.
How to Edit a Video for YouTube
YouTube rewards structure and retention. Open with a strong hook in the first few seconds, use chapters for longer videos, keep the pacing tight with jump cuts, and end with an outro that drives subscriptions. For a data-backed breakdown, see our YouTube editing guide.
How to Edit a Video for TikTok
TikTok is fast, vertical, and sound-on. Hook hard in the first second, cut quickly, use bold animated captions, lean on trending audio, and keep it to 9:16. Our TikTok editing guide covers what top clips do.
How to Edit a Video on Your iPhone
You can edit a full video without a computer. Shoot in the Camera app, then edit in a mobile app like iMovie or CapCut, or upload to a browser-based AI video editor that handles captions and reframing for you. Trim, add captions, drop in music, and export straight to your camera roll or directly to the platform.
Common Beginner Mistakes to Avoid
- Burying the hook. Don't open with a logo or a slow intro — lead with your most interesting moment.
- Skipping captions. Silent autoplay means no-caption videos get scrolled past.
- Over-using transitions. Flashy effects distract more than they impress.
- Ignoring audio. Bad sound sinks good footage.
- Editing without a target. Know the platform and length before you start cutting.
Ready to try it? Edit your first video the fast way with a free AI video editor, then use our 50 video editing tips to make the next one even better.